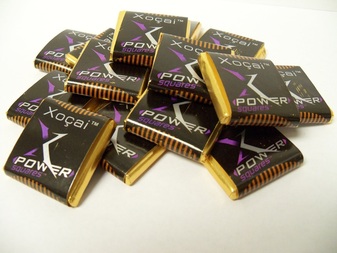
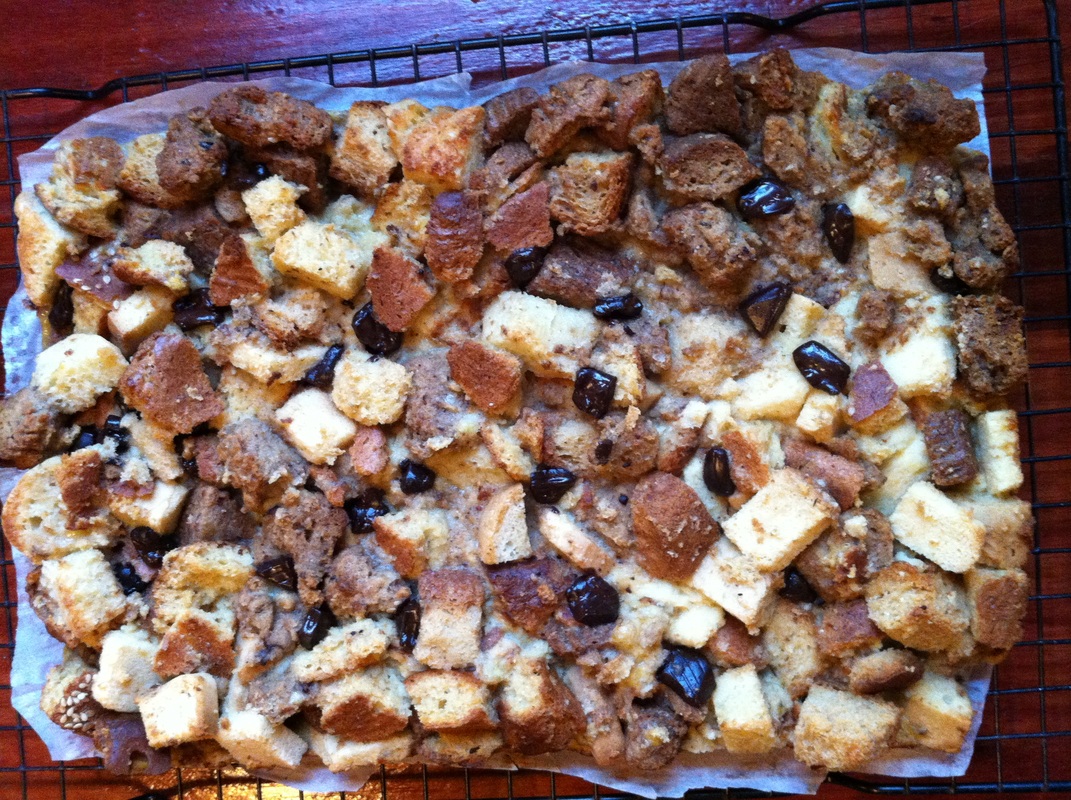
 I have become a healthy dark chocolate cheerleader. You can read all about why it's a great fit for a healthy lifestyle here. I am so impressed with my brand of dark chocolate (Xocai, pronounced show-sigh) that I want to everyone to know about it. So, for a limited time, if you sign up for my mailing list and provide me with your address in the contact form, I'll send you a sample. No pressure, no hype, just a chance to try this high-quality chocolate. Sweet! 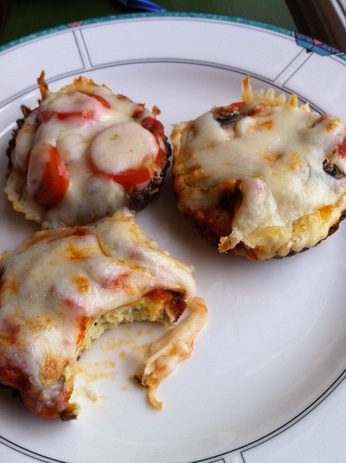 My sister-in-law Kim told me about cauliflower crust pizza awhile ago, but I just hadn't gotten around to trying it. I did look it up on the internet, and I noticed that a number of examples shown in photos had quite crispy edges. I must confess that I've had one too many gluten-free pizza crusts that were a bit burned around the outside, and I don't particularly like the carbonara flavor. I decided to try something crazy and make little tartlets in a muffin tin using foil liners so that they could be a bit better contained and maybe reduce the likelihood of becoming too crispy. I'm also in the middle of reading Joel Fuhrman's book Super Immunity, in which seeds get lifted up as a must-have in any super-high nutrient diet. I had picked up some roasted pepitas earlier in the day, and I decided that grinding them and adding them to the crust would provide some healthy fat and let me reduce the amount of cheese in the crust. Success! These little babies are delicious! I could even have used less cheese, and they would have been fine. The crust was a little puffy and nicely crustly, with no burnt edges. I had several for dinner, but these would be pretty fun as a party food too. You can't really tell from the picture because of the cheese, but two of them have mushrooms, one of them has mushrooms and tomatoes, and two are just plain cheese. I liked every combination. Ingredients: 1 cup grated cauliflower (I used a cheese grater, and it went pretty fast) 1 egg 2 tablespoons roasted salted pepitas, ground (I ground them in my coffee grinder. If you don't have this around, double the cheese in the crust to 1/2 cup) 1/4 cup cheese for crust, plus ~1/4 more for topping 1/2 teaspoon Herbs de Provence (I used this because we were out of dried basil and the oregano was at the back of the cabinet, but you should use whatever pizza seasoning you like) ~1/4 cup pizza sauce (I used jarred sauce from the pantry) Pizza toppings (I had fresh mushrooms and some grape tomatoes on hand, and Joel Fuhrman likes them too) Directions: Preheat oven to 450. Line a muffin tin with 6 foil muffin cups and spray them with non-stick cooking spray. Grate enough cauliflower to have a cup of it (around half a head). Put it in a microwave-safe bowl and microwave it for 4 minutes. (Almost everyone else on the interwebs says to nuke it for 8, but that's WAY TOO LONG in our microwave. I also saw a recipe that didn't microwave the cauliflower at all, so I split the difference and went with 4 minutes.) Let it cool for a couple of minutes so that when you add the cheese and egg it doesn't get weird. Stir in the ground pepitas, cheese, herbs, and egg and combine thoroughly. Divide evenly among the 6 muffin cups until it's evenly divided. Bake for 10 minutes, until the crusts are a little puffy and starting to brown on the edges (but not too brown!). Remove from the oven, turn the oven up to broil, and while it's heating, top your crusts with a spoonful of sauce, toppings and cheese. Put under the broiler until the cheese is bubbly. Remove. Let cool for a couple minutes to let the cheese set up, then pop the tarts out of the foil cups. Enjoy! 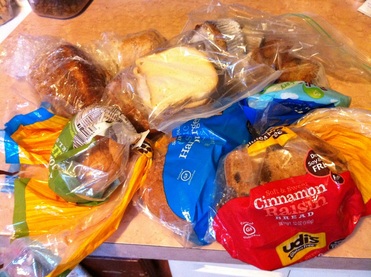 My random collection of gf breads in the freezer I have so much to celebrate! After a kajillion fun but long work days for my Day Job, I have FOUR DAYS OFF! Woohoo! My Happy Healthy Gluten Free facebook page hit 500 subscribers. Sweet! I'm feeling great, the family is fine, our dog is cute, and all is right with the world. So of course it's time for a recipe to share! I'm a little self-conscious that I use bananas in so many recipes, but its not unusual for us to have some geriatric specimens around that need to get used up. In their (and my) defense, they are a great source of natural sugars and fiber and they taste great. Additionally, after 18 years of not eating chocolate, I'm putting my toes in the water of baking and cooking with healthy dark chocolate. [Besides tasting great, I'm totally sold on the health benefits of dark chocolate, so much so that I've become a distributor of Xocai Healthy Dark Chocolate. Learn more about the health benefits and how to get some for yourself here.] The weather forecast for today called for major dreariness -- rain, sleet and hail with a little snow mixed in. In this part of the country, that usually means a run to the store for eggs, milk and bread. For me, it means it's time to use up the weird collection of gluten-free baked odds and ends in our small above-the-refrigerator freezer. Since we already had eggs and (almond) milk on hand, I decided to go for a gluten-free chocolate chunk banana bread pudding. Having made gf bread pudding before, I have to note that milk, sugar, eggs, bananas and chocolate can go only so far to fix dreadful-to-begin-with bread, so if you saved some awful tapioca-based loaf at some time in the past, just throw it out. It can't be salvaged. Life's too short. Ingredients: Approximately 10 cups of gf bread, cut into cubes (I didn't use the raisin bread you see in the picture, but did use some muffins, rolls and random slices of both light and dark-colored breads) 2 cups plain unsweetened almond milk 4 eggs 1/2 cup sugar Tablespoon of vanilla scant 1/8 teaspoon of salt 1 ripe banana, mashed 1.5 oz dark chocolate chunks (I used 7 Xocai Power Squares broken into pieces) Directions: Preheat the oven to 350 degrees. Spray a rectangular baking pan with non-stick cooking spray. (I lined our 9" X 13" baking pan with parchment paper because we don't have dedicated gf baking pans and a girl can't be too careful.) Put the bread cubes in the baking pan. Combine the milk, eggs, sugar, vanilla, and salt in a bowl and mix thoroughly. Fold in the banana and chocolate. Pour it over the bread cubes. Let it sit for a couple of minutes to allow the liquid to soak into the bread. Cover with foil and bake for 30 minutes. Remove the foil and bake for 10-15 minutes more, until it's cooked through and through. Remove from the oven and let it cool. Because I could, I lifted mine out of the pan by its parchment paper and let it cool on a wire rack. For the photo opp, I cut back the parchment paper, but that was purely cosmetic. Anything for my art. I think it might qualify as irony, but I let it cool and put half of it in the freezer to reduce the risk that I would eat it all in one sitting. I will be traveling to Atlanta tomorrow for a two day work trip. I have been in touch with my hosts who are arranging meals to make sure that I won't be caught high and dry. I feel pretty confident that everything will go well, but just in case, I will make my usual precautions. Check out my YouTube video for how to stay happy and healthy on the road. (blogging from my phone... Sorry it is not prettier!)
http://www.youtube.com/watch?v=Heu3xsldmWE&feature=youtube_gdata_player I sent the Spring newsletter this morning. You should sign up here to get it delivered directly to your mailbox! In case you want to check it out, you can read it here. USDA food policies, protein in veggies, more about chocolate, and all kinds of news and notes.
In the meantime, I'm working crazy hours at the Philadelphia Flower Show. If you are around, come see me at the PHS exhibit! |
Archives
January 2024
|

 RSS Feed
